Tint2 is a simple panel/taskbar made for OpenBox and other window managers. Tint2 is lightweight, very configurable and have powerfull GUI configurator – tint2conf.
In this article we will look how to configure basic tint2 options in Mabox: position, width, autohide, adding launchers to panel and so on.
tint2conf – powerfull GUI for tint2 configuration
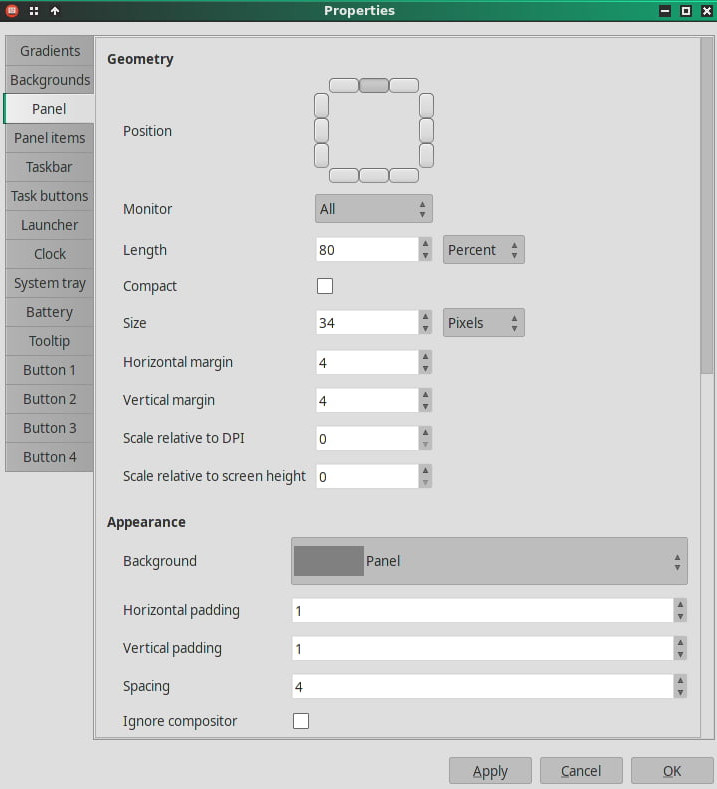
tint2conf is a very powerful configurator, you can set up colors, gradients, buttons and executors and many other settings – and in fact create your own panel configuration entirely.
For basic settings, you’ll probably only need the Panel tab.
Here you can set, among others: position, width, height, auto-hide.
Panel launchers (icons)
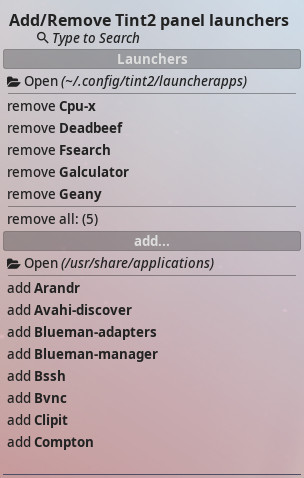
A helper is available in Mabox, which is designed to facilitate adding/remove programs to the panel.
Go to menu super -> Mabox config -> Tint2 panels -> Add/Remove Launchers….
You will see menu like in the picture on right side. Just keep adding your favorite applications, the panel will be reloaded automatically.
You can type to search for your favorite program here.
Removing launchers is also very easy.
When everything you like is added hit Esc or just click outside menu to leave it.
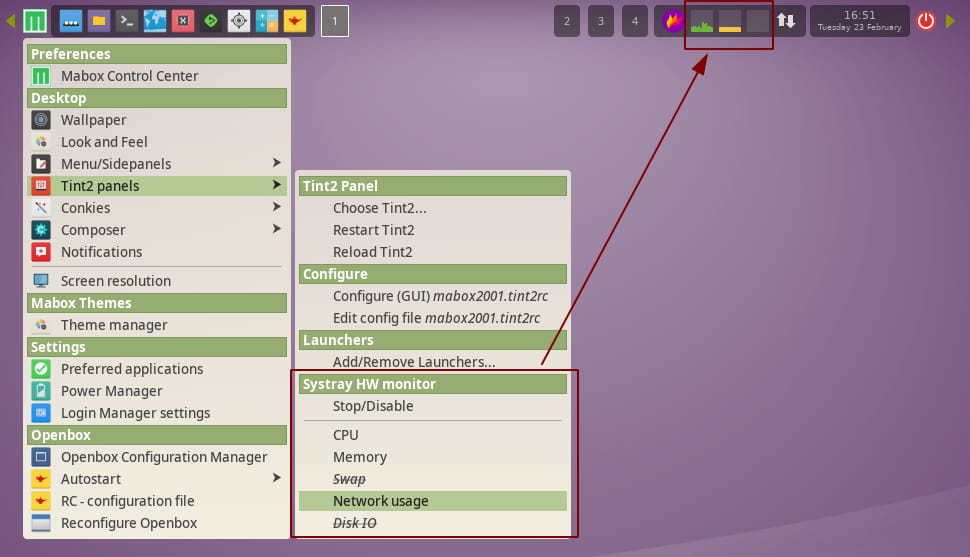
Mini HW monitor in system tray
Another Mabox addition to tint2 panel is mini Hardware monitor in system tray. There are five monitors: CPU, RAM, Swap, Net and Disk IO.
Go to menu super -> Mabox config -> Tint2 panels to activate and configure it.
Left click on the monitor will launch LXtask.
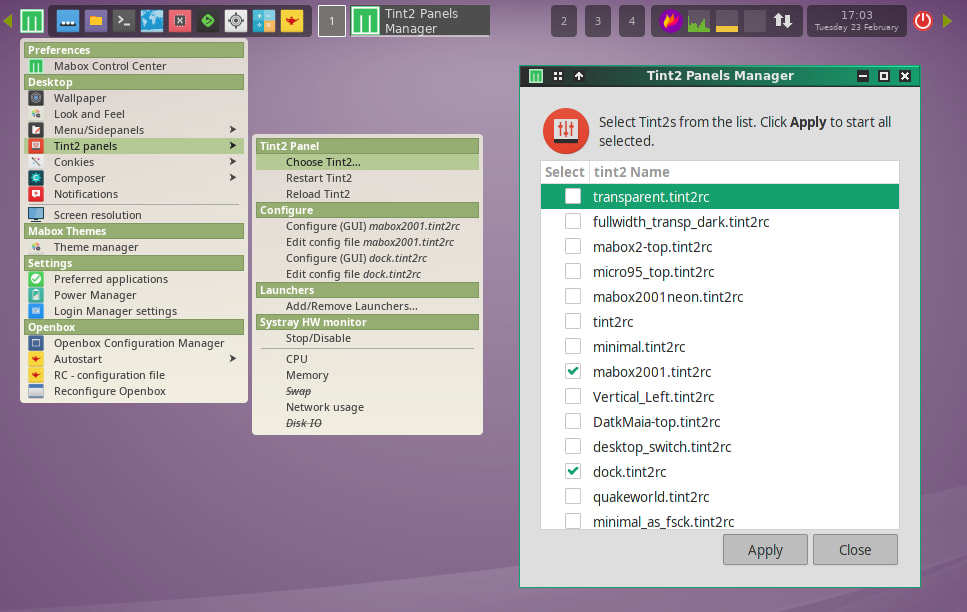
Choose tint2
Mabox ships with several tint2 configuration files – located at ~/.config/tint2. To select which one you want to run use Tint2 chooser GUI script made by BunsenLabs (very good Openbox distribution based on Debian).
Go to menu super -> Mabox config -> Tint2 panels -> Choose Tint2…
You can also run more than one tint2 panel.

Reset to defaults
In case when trying to configure tint2 you break something and want to return to the default settings, you can use the command that will overwrite all tint2 configuration files to the version as shipped with the distribution.
Just execute the command in the terminal:
mb-reset tint2Video: